- Part 1: Architecture & Strategy
- Part 2: Installing Proxmox VE on ZFS Properly
- Part 3: Running PBS in a VM on Your Main PC
- Part 4: Automated ZFS Snapshots with Sanoid
- Part 5: ZFS Replication Using Syncoid
- Part 6: Backing Up VMs to Proxmox Backup Server
- Part 7: Telegram Notifications for PVE & PBS
- Part 8: Full Backup Automation Scripts
- Part 9: Disaster Recovery Simulation
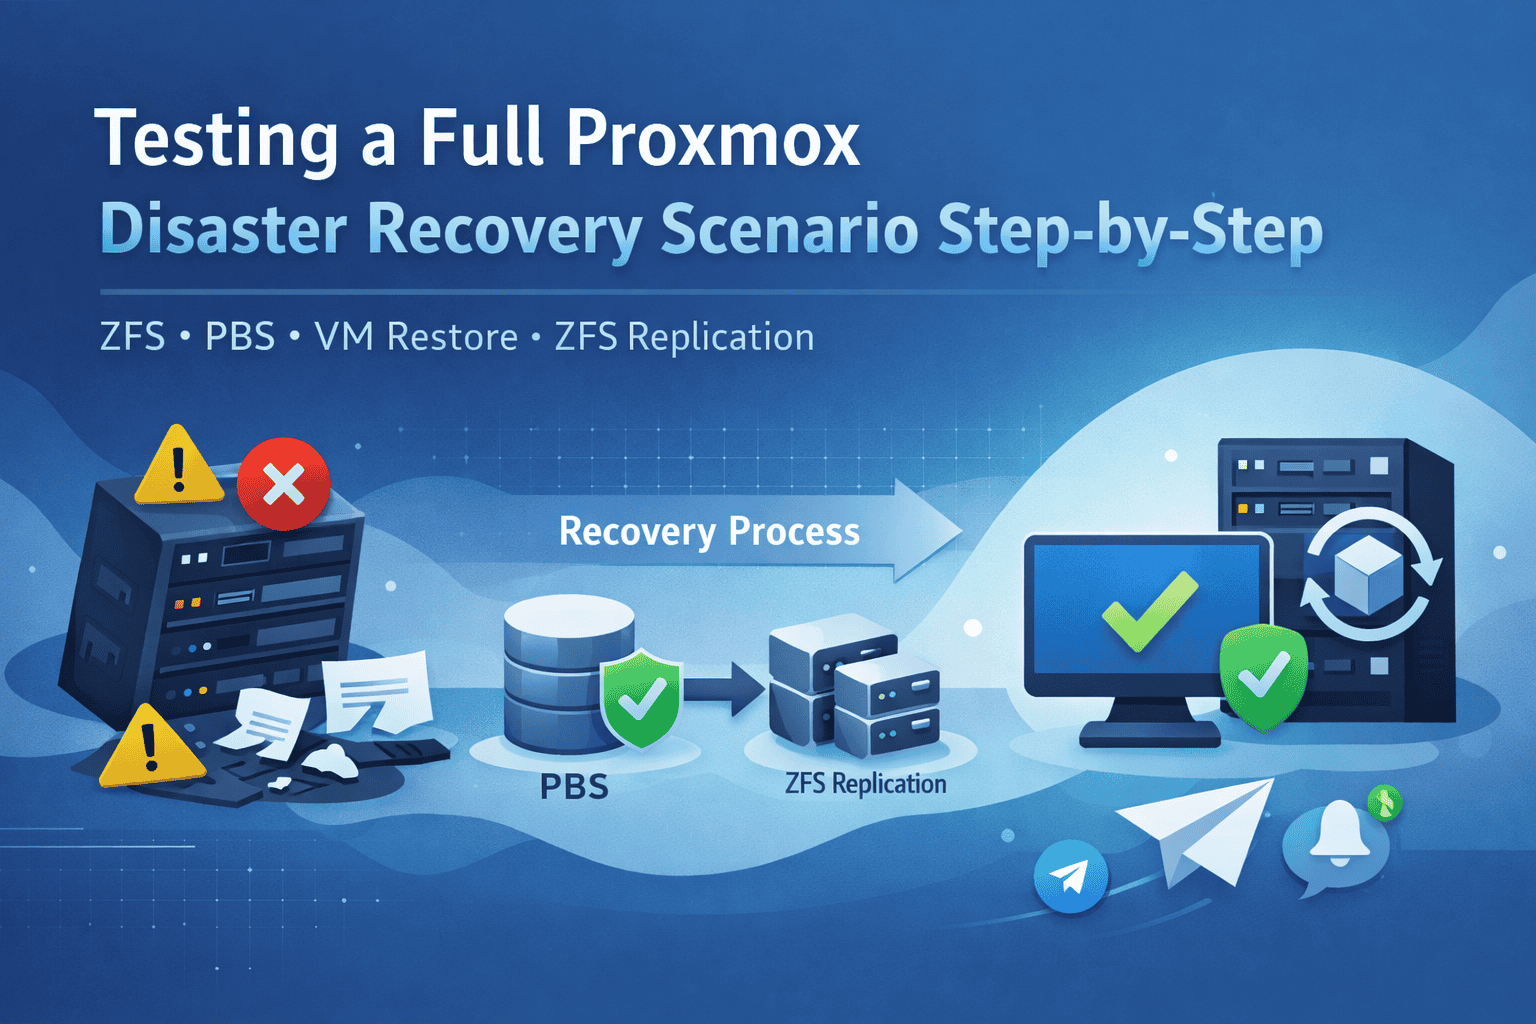
Why Disaster Recovery Testing Matters
If you think your backups are reliable, think again. Many homelab users make the critical mistake of assuming that “everything is safe” until disaster strikes. Without testing, you can’t be sure that:
- Snapshots are complete
- Backups are restorable
- ZFS replication works as intended
This post walks you through a full disaster recovery (DR) simulation for your Proxmox + ZFS + PBS homelab. By the end, you’ll have a repeatable process to restore VMs, datasets, and verify integrity—without risking your production environment.
Planning the Simulation
Before you start, define the scope of your DR drill:
- Select test VMs or datasets
Choose non-critical VMs or clones to avoid real data loss. - Define disaster scenarios
Typical examples include:- Complete PVE host failure
- Storage corruption on ZFS
- Accidental VM or dataset deletion
- Prepare safety measures
- Use a separate test environment if possible
- Ensure PBS backups and replication datasets are intact
- Document steps clearly
A well-planned DR simulation avoids panic and helps you identify gaps in your backup architecture.
Simulating Failure
Now, it’s time to “break” things safely:
- Host offline
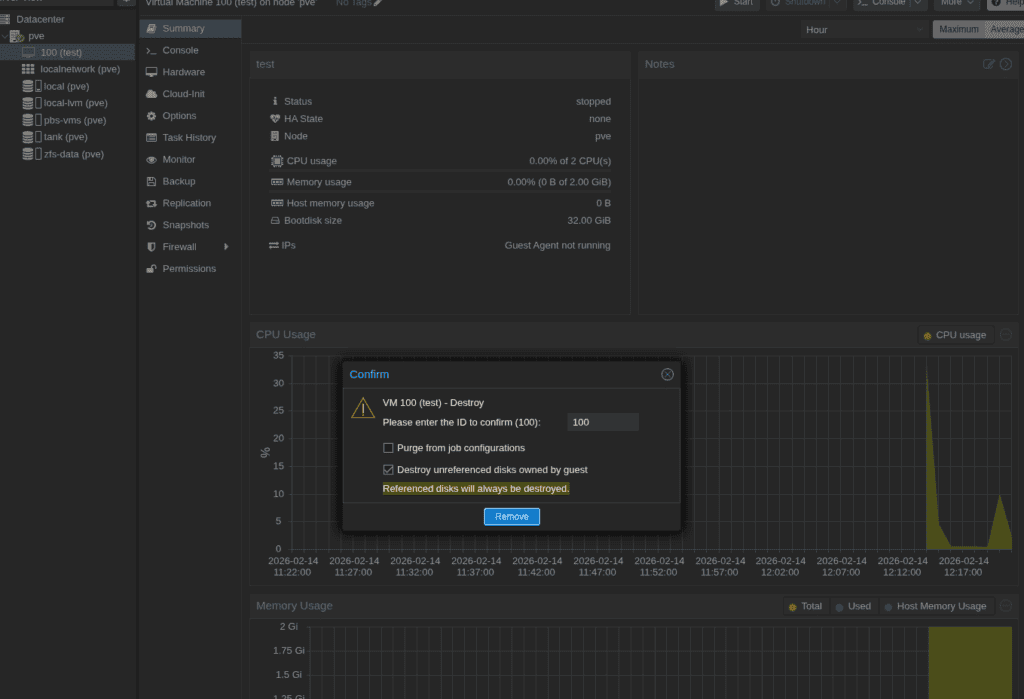
Power off your Proxmox server or disconnect its storage. - VM deletion
Delete a test VM intentionally to simulate accidental removal. - Dataset corruption
Optionally, modify or remove files in a test dataset to simulate ZFS corruption.
Each simulation should test a different recovery path: snapshot restore, PBS restore, or ZFS replication.
Here is VM deletion and restoring from local backup example:
Restoring from PBS Backups
Proxmox Backup Server is your safety net for VM restoration:
- Log into PBS Web UI
Navigate to the VM or container backup. - Select the latest backup
Check incremental and full backups for the VM. - Restore to original or alternate location
Original location restores VM as-is.
Alternate location allows safe verification without overwriting live data. - Verify restore completion
Boot the VM in a test network if possible and confirm applications run correctly.
Here is VM deletion and restoring from PBS example:
Pro tip: PBS incremental backups reduce storage usage but always validate incremental restore workflows during DR drills.
Restoring ZFS Replicated Data
ZFS replication via Syncoid ensures datasets are mirrored across servers:
- Identify the target dataset
Make sure replication exists on the secondary server. - Pull the replicated dataset
Use Syncoid to replicate changes back to your primary server:
syncoid secondary-server:pool/testdataset primary-server:pool/testdataset- Validate properties & integrity
Check for correct ownership, permissions, and snapshot hierarchy:
syncoid secondary-server:pool/testdataset primary-server:pool/testdataset- Optional performance check
Benchmark dataset read/write to confirm usability.
Validating Restores
Validation is critical—don’t skip this step:
- VM Boot Test: Boot restored VMs in an isolated network.
- Data Integrity: Compare restored files against a checksum or snapshot reference.
- ZFS Checks: Run
zpool scrubandzfs listto verify dataset health.
A DR test is incomplete without confirming that systems are fully operational.
Lessons Learned & Best Practices
After every simulation, document findings:
- What went well: Fast restores, deduplicated backups, snapshot consistency.
- What failed: Broken replication scripts, missed incremental backups, corrupted snapshots.
- Improvements: Automate verification scripts, schedule periodic DR drills, and configure Telegram alerts for failures.
A DR simulation is as much about learning your system’s limits as it is about recovery.
Optional Automation Tips
Make DR testing part of your workflow:
- Simulate disasters safely: Scripts can delete test VMs or datasets and automatically restore them.
- Schedule DR drills: Monthly or quarterly testing keeps your process sharp.
- Telegram notifications: Alert you on restores, failures, or integrity checks in real-time.
Conclusion
A robust backup architecture is useless without testing. By simulating disasters, restoring from PBS, and verifying ZFS replication, you can trust your homelab backups and gain confidence in your recovery workflow.
Following this guide ensures that when real failures occur, you’re prepared, automated, and alert—not panicking.
Recommended Commands & References
# List snapshots for validation
zfs list -t snapshot -r pool/testdataset

# Scrub ZFS pool for integrity
zpool scrub pool

# Sync datasets with Syncoid
syncoid secondary-server:pool/testdataset primary-server:pool/testdataset- Part 1: Architecture & Strategy
- Part 2: Installing Proxmox VE on ZFS Properly
- Part 3: Running PBS in a VM on Your Main PC
- Part 4: Automated ZFS Snapshots with Sanoid
- Part 5: ZFS Replication Using Syncoid
- Part 6: Backing Up VMs to Proxmox Backup Server
- Part 7: Telegram Notifications for PVE & PBS
- Part 8: Full Backup Automation Scripts
- Part 9: Disaster Recovery Simulation
Mohammad Dahamshi is a skilled Embedded Software Engineer and web developer. With experience in C/C++, Linux, WordPress, and DevOps tools, he helps businesses solve technical challenges and build reliable digital solutions. Fluent in Arabic, Hebrew, and English, he also runs Saratec, offering web design and digital marketing services.
[…] Part 9 will take everything you’ve automated so far and test a full disaster recovery scenario. You’ll simulate a failure on your Proxmox host, restore your ZFS datasets from PBS, recover VM backups, and validate that all notifications and scripts function correctly. This step ensures that your automated workflow is not just theoretical — it’s battle-tested and reliable. […]