- Part 1: Architecture & Strategy
- Part 2: Installing Proxmox VE on ZFS Properly
- Part 3: Running PBS in a VM on Your Main PC
- Part 4: Automated ZFS Snapshots with Sanoid
- Part 5: ZFS Replication Using Syncoid
- Part 6: Backing Up VMs to Proxmox Backup Server
- Part 7: Telegram Notifications for PVE & PBS
- Part 8: Full Backup Automation Scripts
- Part 9: Disaster Recovery Simulation
The Reality of Typical Homelab Backups
Most homelab backups start the same way:
You schedule nightly backups… and everything looks fine — until you actually need to restore.
Then you discover the painful truth:
- Backups are huge
- They take forever to transfer
- Storage fills up quickly
- Restores are slow and stressful
This happens because traditional VM backups are full-image copies every time.
They don’t understand what actually changed.
They just copy everything again and again.
That’s exactly the problem PBS was designed to solve.
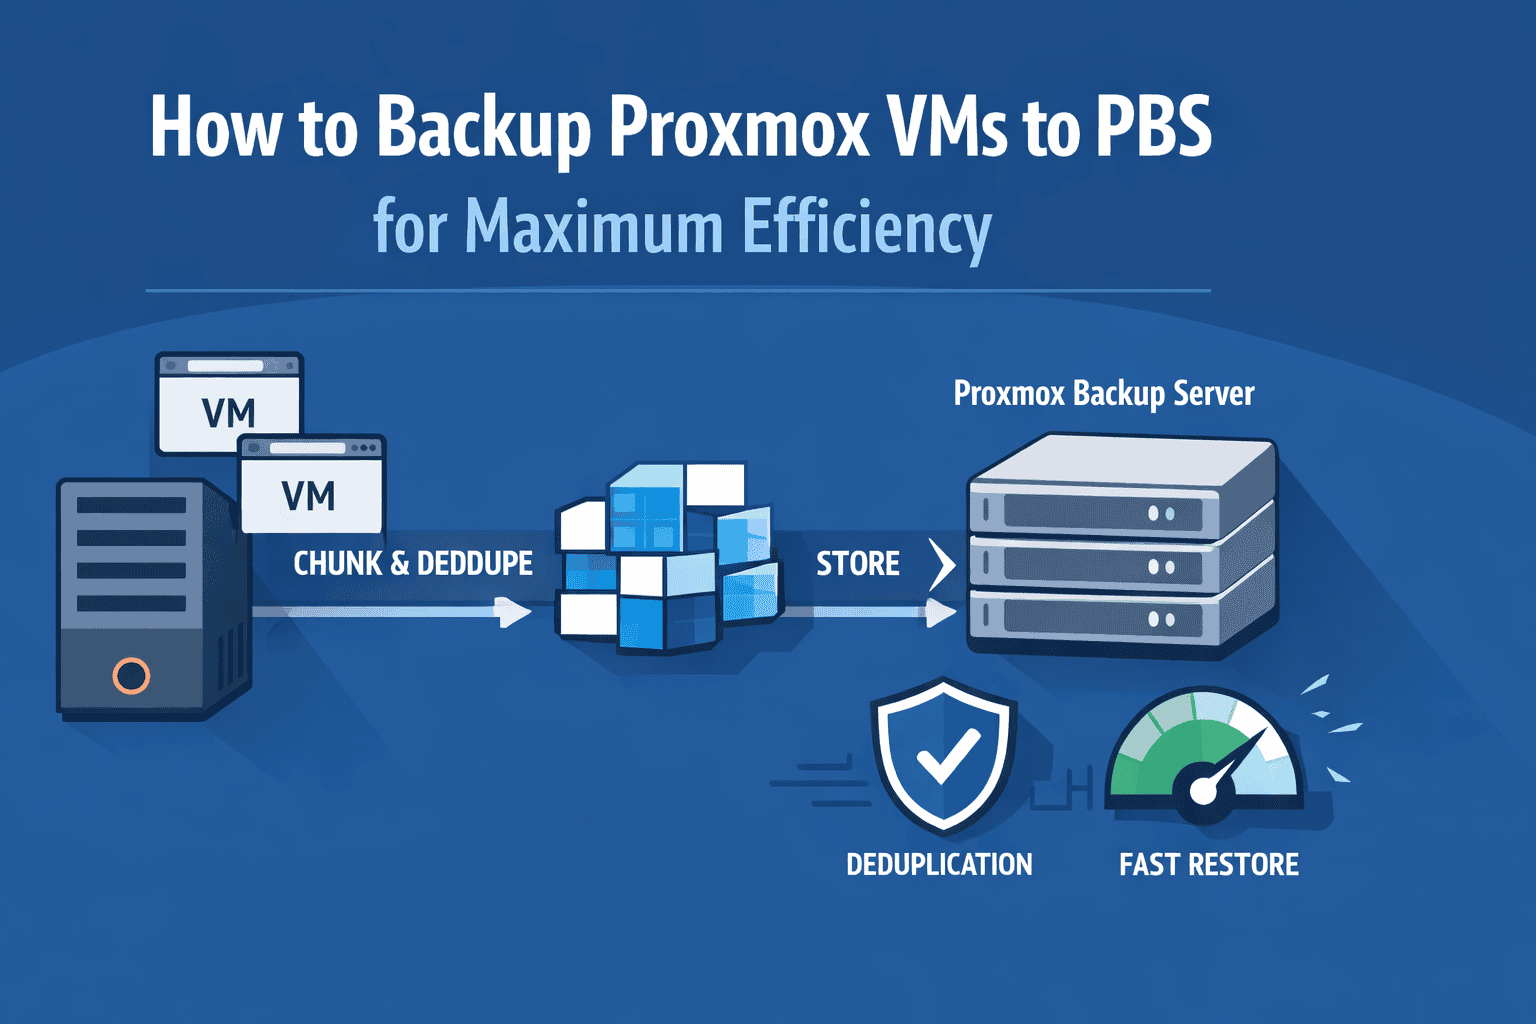
Why PBS Backups Are Different (And Better)
Instead of storing entire VM images repeatedly, PBS uses a completely different approach:
Chunk-Based Storage
When a VM is backed up:
- Its disk is split into small chunks
- Each chunk is fingerprinted
- Only new or changed chunks are stored
This means:
👉 If only 2% of a VM changes, only 2% gets backed up.
Global Deduplication
This is where PBS becomes incredibly powerful.
Deduplication happens:
- Across all VMs
- Across all backup snapshots
- Across all time
Example:
If 10 VMs contain the same OS files, PBS stores them once.
This can reduce storage usage by 80–95% in real environments.
Incremental Forever Backups
PBS does not create traditional “full + incremental” chains.
Instead, every backup is:
- Incremental
- Independent
- Fully restorable
This design eliminates chain corruption problems.
Connecting Proxmox VE to PBS
Let’s configure the integration.
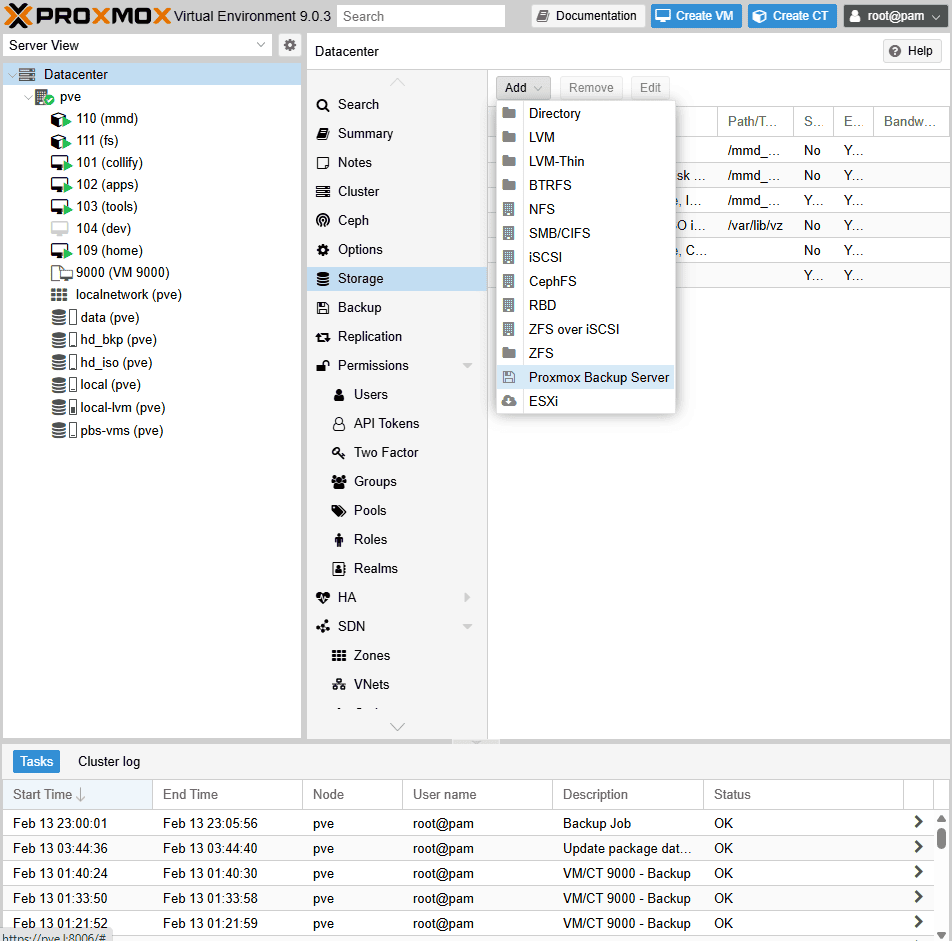
Step 1 — Add PBS Storage
In your Proxmox web interface:
Datacenter → Storage → Add → Proxmox Backup Server
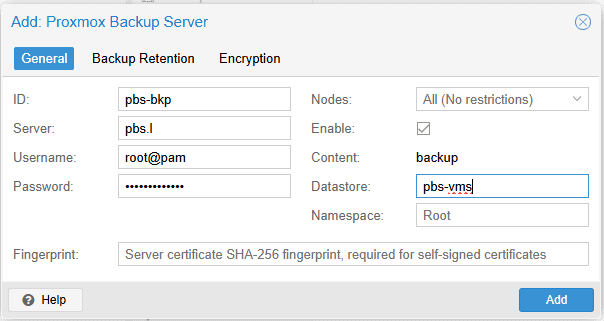
Fill in:
- Server: PBS IP address (I use pi.hole for local dns so I typed pbs.l)
- Datastore: your PBS datastore name
- Username: usually
root@pam - Password
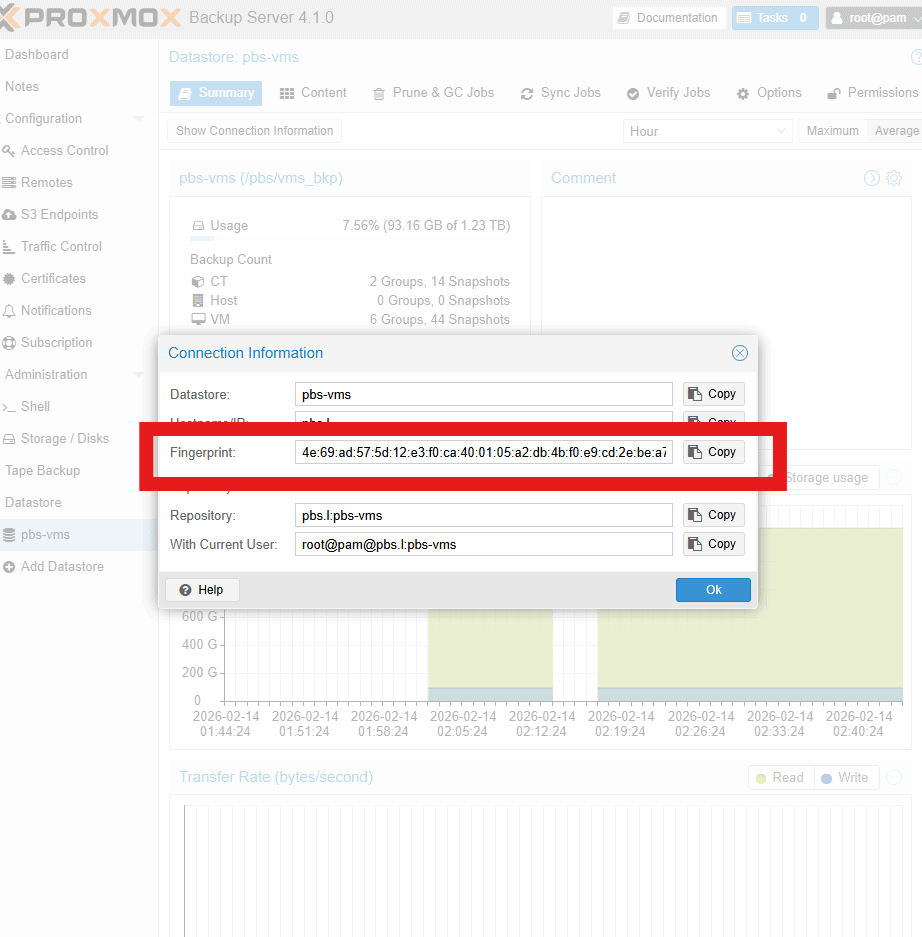
- Finger print
From pbs, get the finger print
Datastore→ pbs-vms→ Show Connection Information
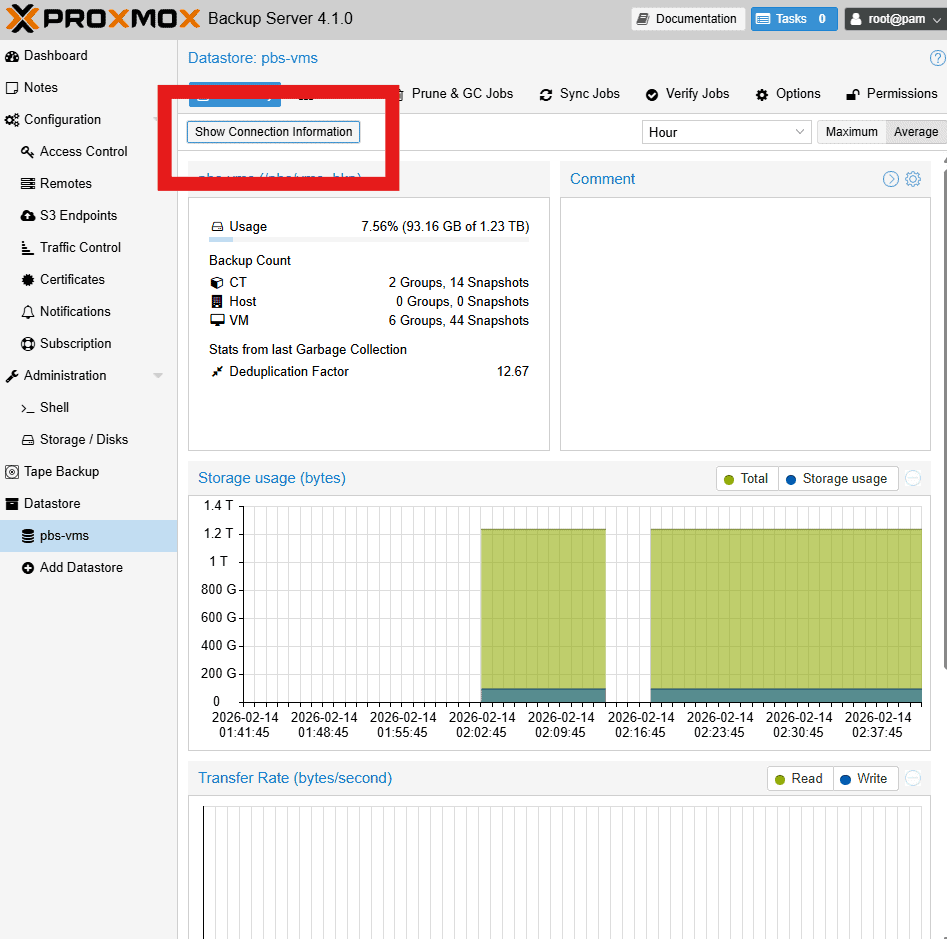
Copy the finger print:
Although you can use username + password, it is better to create an API token, it is more secure and better for scripts. Take a look at this article for how to create one: How to Create an API Token in Proxmox Backup Server (PBS).
Step 2 — Enable Encryption (Strongly Recommended)
Check:
Encrypt backups
This generates an encryption key.
IMPORTANT:
Download and securely store the key file.
Without it:
Your backups cannot be restored — ever.
Many homelab users learn this the hard way.
Designing an Efficient Backup Strategy
This is where most people either succeed… or create future problems.
Best Practice: Stagger Backup Jobs
Avoid running all VM backups simultaneously.
Instead:
- Critical VMs → early backup window
- Less critical → later windows
This prevents:
- Network congestion
- Storage I/O bottlenecks
- Backup failures
Recommended Schedule Example
Daily Incrementals
- Run nightly during low usage hours
Retention Policy Example
A proven strategy:
- Keep last 7 daily backups
- Keep 4 weekly backups
- Keep 6 monthly backups
PBS handles pruning automatically.
No manual cleanup required.
Performance Optimization Tips
PBS is fast — but only if configured properly.
Use Fast Storage for PBS
Best performance order:
- NVMe SSD (ideal)
- SATA SSD (good)
- HDD (acceptable but slower)
Deduplication and verification are I/O intensive.
Slow disks dramatically reduce performance.
Network Speed Matters
For large environments:
- 1GbE → fine for small labs
- 2.5GbE → excellent upgrade
- 10GbE → ideal for heavy workloads
Backups can saturate network links quickly.
Parallel Backup Tuning
In backup job settings:
Adjust:
Max Workers
Typical recommendations:
- Small lab → 2–3
- Medium lab → 4–6
More workers = faster backups, but higher I/O load.
Verifying Backup Integrity (Critical but Often Ignored)
Backups are useless if corrupted.
PBS includes built-in integrity tools.
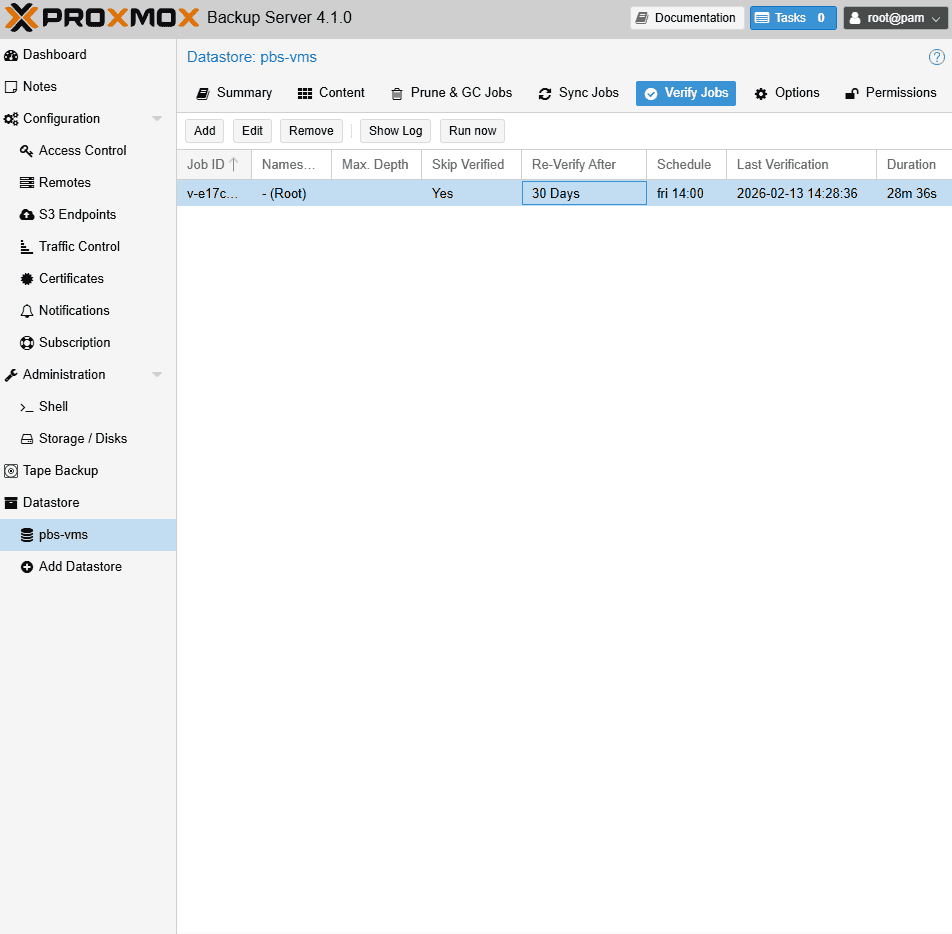
Verification Jobs
These scan stored chunks to ensure:
- No silent corruption
- Data is readable
- Checksums match
Best practice:
Run verification weekly.
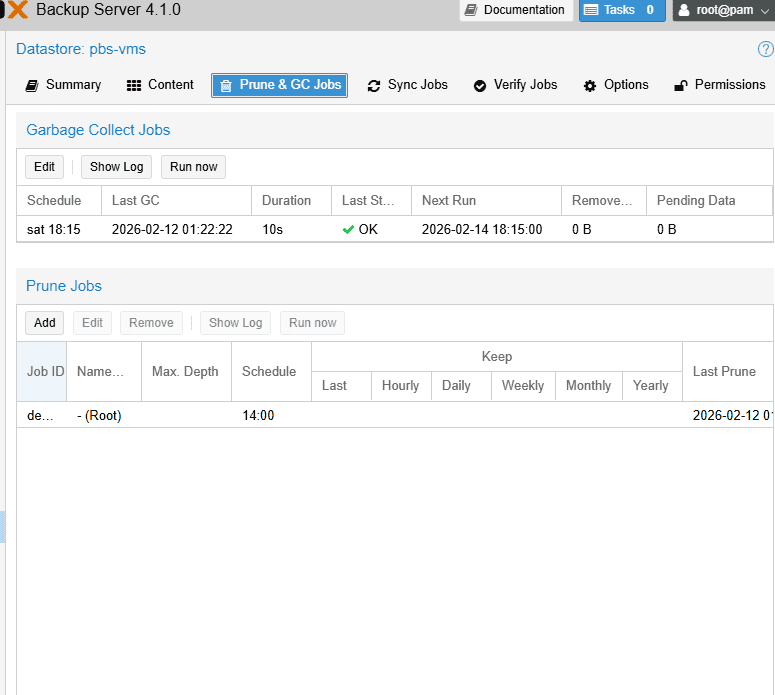
Garbage Collection
Over time, unused chunks accumulate.
Garbage collection removes:
- Orphaned chunks
- Unreferenced data
This frees storage safely.
Restoring VMs from PBS
This is where PBS truly shines.
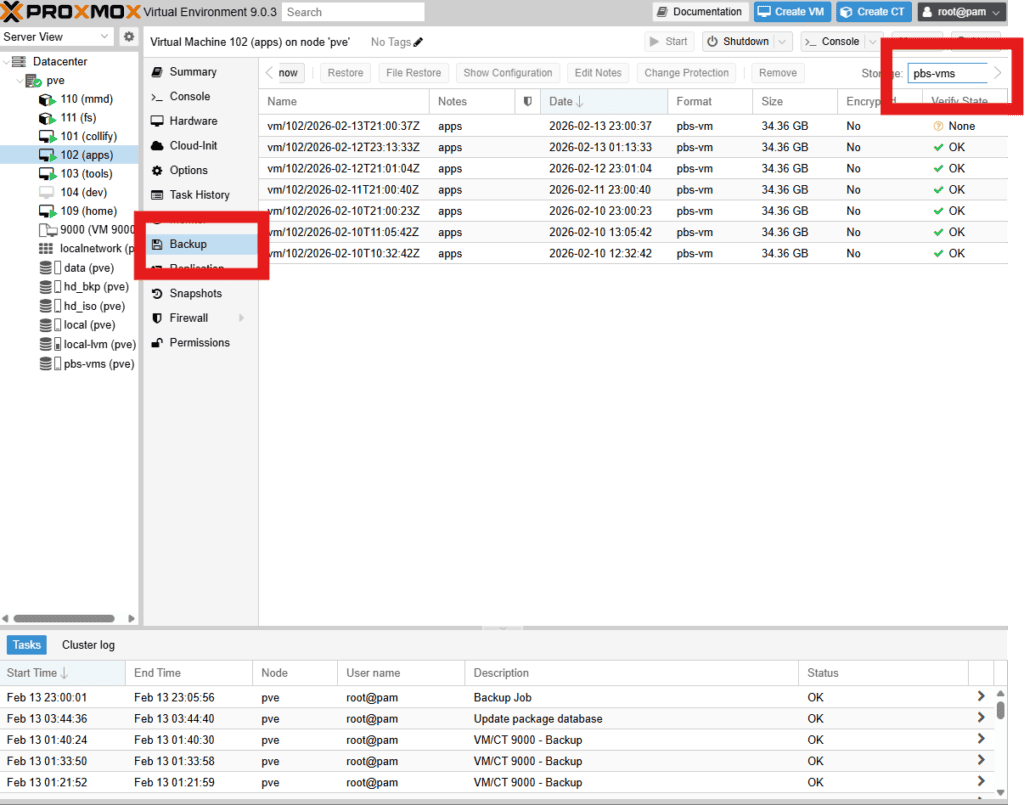
Full VM Restore
The standard method.
Process: At PVE, select VM you want to restore
- Select backup snapshot
- Choose target node/storage (pbs-vms)
- Start restore
Result:
Fast, reliable, predictable.
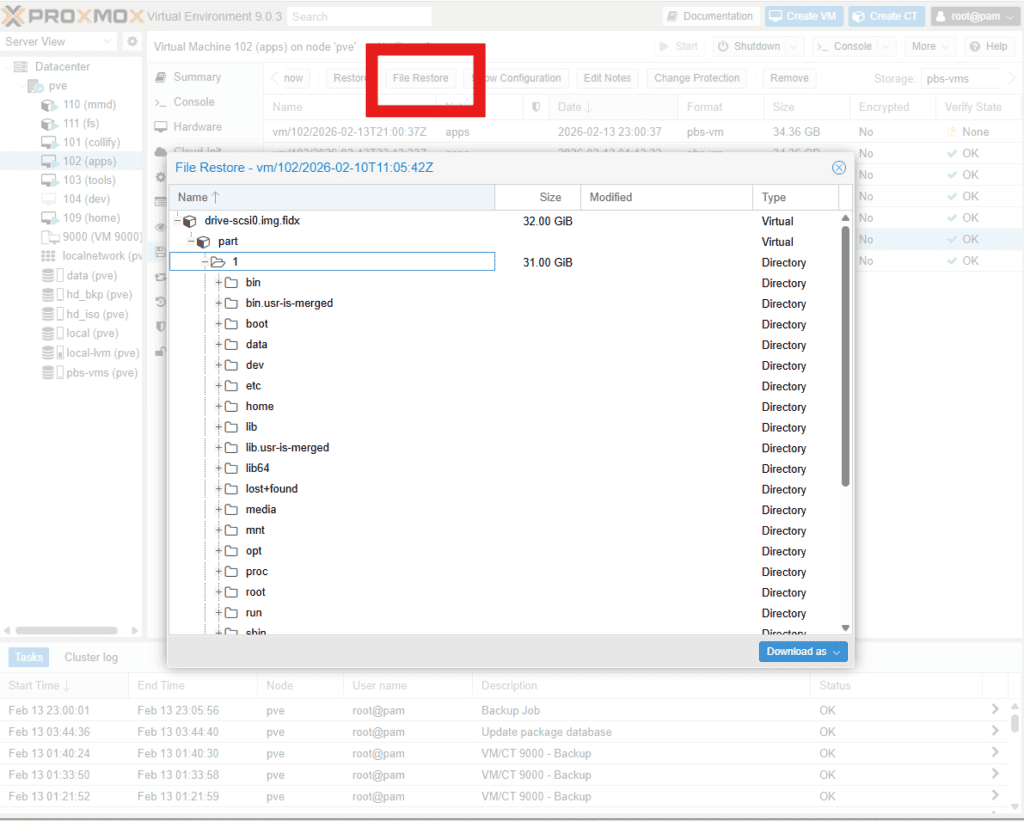
File-Level Restore
One of PBS’s most powerful features.
From PVE, Select backup, You can:
- Mount a backup snapshot
- Browse files
- Restore individual files
No full VM restore required.
This saves massive time during emergencies.
Instant Restore
For critical outages:
PBS supports starting VMs directly from backup storage.
Benefits:
- Near-instant recovery
- Minimal downtime
- Restore in background
This feature is a lifesaver in production scenarios.
Real-World Lessons Learned
These are the insights most tutorials don’t tell you.
Always Backup Encryption Keys
If you lose the key:
Backups become permanently unreadable.
Store copies:
- Offline
- On another server
- In password manager
Never Run PBS on the Same Host
This defeats the entire purpose of backups.
Hardware failure would destroy:
- Production VMs
- Backups simultaneously
Always separate hosts.
Plan Storage Capacity Generously
Deduplication helps — but growth is inevitable.
Rule of thumb:
Plan for 3–5 years of retention growth.
Schedule Backup Windows Carefully
Poor scheduling causes:
- VM performance drops
- Backup failures
- User complaints
Always test backup timing.
Why PBS Is Superior to Traditional Backups
Traditional backups are:
- Slow
- Wasteful
- Hard to manage
PBS offers:
- Incremental forever backups
- Global deduplication
- Fast restores
- Built-in integrity verification
It transforms backups from a chore into a reliable safety net.
What’s Next in the Series
In the next part, we’ll move beyond passive backups and build:
👉 Real-Time Backup Notifications
You’ll learn how to:
- Create a Telegram bot
- Send automated alerts
- Monitor backup success and failures
- Build a proactive backup monitoring system
This is where your architecture becomes truly production-grade.
- Part 1: Architecture & Strategy
- Part 2: Installing Proxmox VE on ZFS Properly
- Part 3: Running PBS in a VM on Your Main PC
- Part 4: Automated ZFS Snapshots with Sanoid
- Part 5: ZFS Replication Using Syncoid
- Part 6: Backing Up VMs to Proxmox Backup Server
- Part 7: Telegram Notifications for PVE & PBS
- Part 8: Full Backup Automation Scripts
- Part 9: Disaster Recovery Simulation
Mohammad Dahamshi is a skilled Embedded Software Engineer and web developer. With experience in C/C++, Linux, WordPress, and DevOps tools, he helps businesses solve technical challenges and build reliable digital solutions. Fluent in Arabic, Hebrew, and English, he also runs Saratec, offering web design and digital marketing services.
[…] Part 6: Backing Up VMs to Proxmox Backup Server […]